Showing posts with label hat. Show all posts

Monday, December 22, 2014

Frogs and snails and puppy-dogs' tails...

...that's what little boys are made of.

...which is kind of exciting considering my brothers wife is due soon and she's having a boy!
Oh and beards and elephants... pretty sure they are made of those too! ;)
My brother and his wife were happy to help me pick out the right kind of colors for these projects. They are in Iowa so we did a lot of picture taking and texting! :D The elephant set to match the nursery and the hat and beard set to match my brothers beard. ^-^ 


The pattern for the elephant lovely & rattle set will be available in my etsy shop, eventually :).

I freehanded the hat & beard because I couldn't find a pattern online.
The hat is knit and the beard crocheted to match the photo my brother sent me.
The buttons were added to face away from the babies head so that they wouldn't rub against babies head and mom and dad can adjust the beard to sit where they want it. :)


I can't wait to see the little man play with these things or wear them!
Good times are ahead! :D
Thank you for looking!

Monday, November 17, 2014

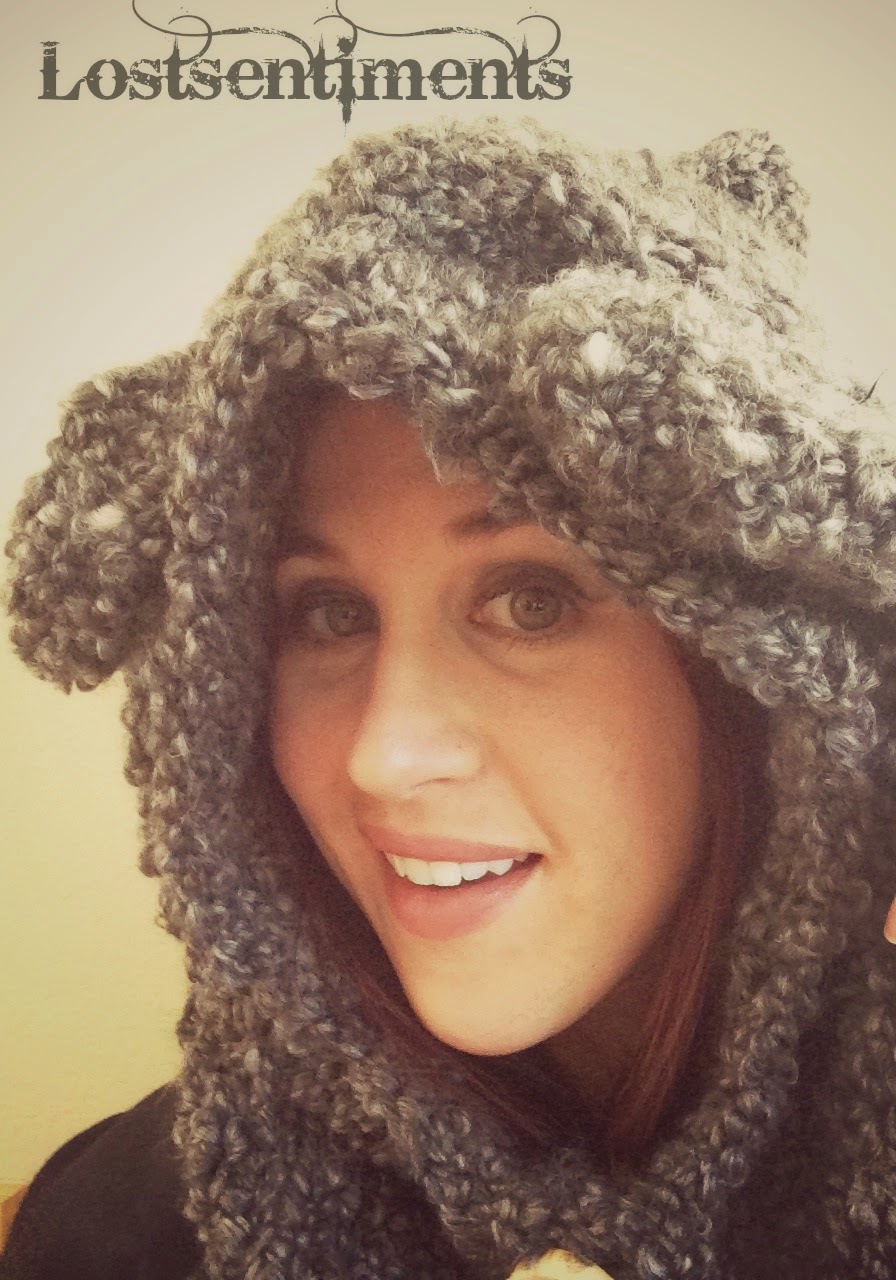
Knit Burton Bear Cowl

...and then some!

A girlfriend of mine wanted one of the adult sized Burton Bear cowl and a few others without ears - so I obliged! :)

I wanted to share the pics of the one with ears here with you! :D These hoodies are so much fun! :D


Wednesday, May 28, 2014

Princess Leia Crocheted Hat for 3 - 6 Month Old

Hello friends! A coworker of mine recently found out she was going to be an auntie! She's pretty sure that they'll be having a girl and requested a Princess Leia hat be made.

Over the course of a few days I figured out a pattern using double crochet throughout and then stitched together braided yarn to look like hair buns. Since I wasn't 100% sure how big the babies head will be, I decided I would make it bigger than for your typical newborn so they had something to grow into versus the hat possibly being too small. I used dimensions from crochetgeek.com for a 3 - 6 month old. Circumference of 14 inches with hat height of 5 1/2 inches.

Sometimes it amazes me how something as simple as attaching 2 faux hair buns to a crochetted hat transforms it from an otherwise boring hat to "omigoodness that's so cute!" kind of hat! :)  See! :D

***UPDATE: I truly just like sharing my finished items... but due to popular demand, I've created a listing for this hat for all sizes (please check the dimensions in the listing). I will be offering this hat for a limited time. Feel free to grab more than one ;) Find the hat HERE.


Sunday, March 16, 2014

Father and Daughter Yub Nub Scoodies

Are you sick of seeing these yet?! I sure hope not! :D They are the last two I'll make for a while but I am elated to be giving them to a dear friend who will in the end had a family set! :D

The green scoodie came out larger than I’d anticipated, but you know, sometimes that happens! :) Luckily grown men have larger heads, so this scoodie went from “Oh my friends lil girl will grow into it” to  "Oh my friends husband will appreciate this, especially since his wife and baby will already have one!” Ergo - it's a daddy hat! :) 
Yep. It’s all in how you spin it :) ;).

Here's hoping my friend will use the set for a Christmas card sheninnigans butcha know its really okay if not too! ;) They're a super fun family, I'm just glad they'll appreciate having a set! :D Yes.


Sunday, March 2, 2014

Scoodies Galore!

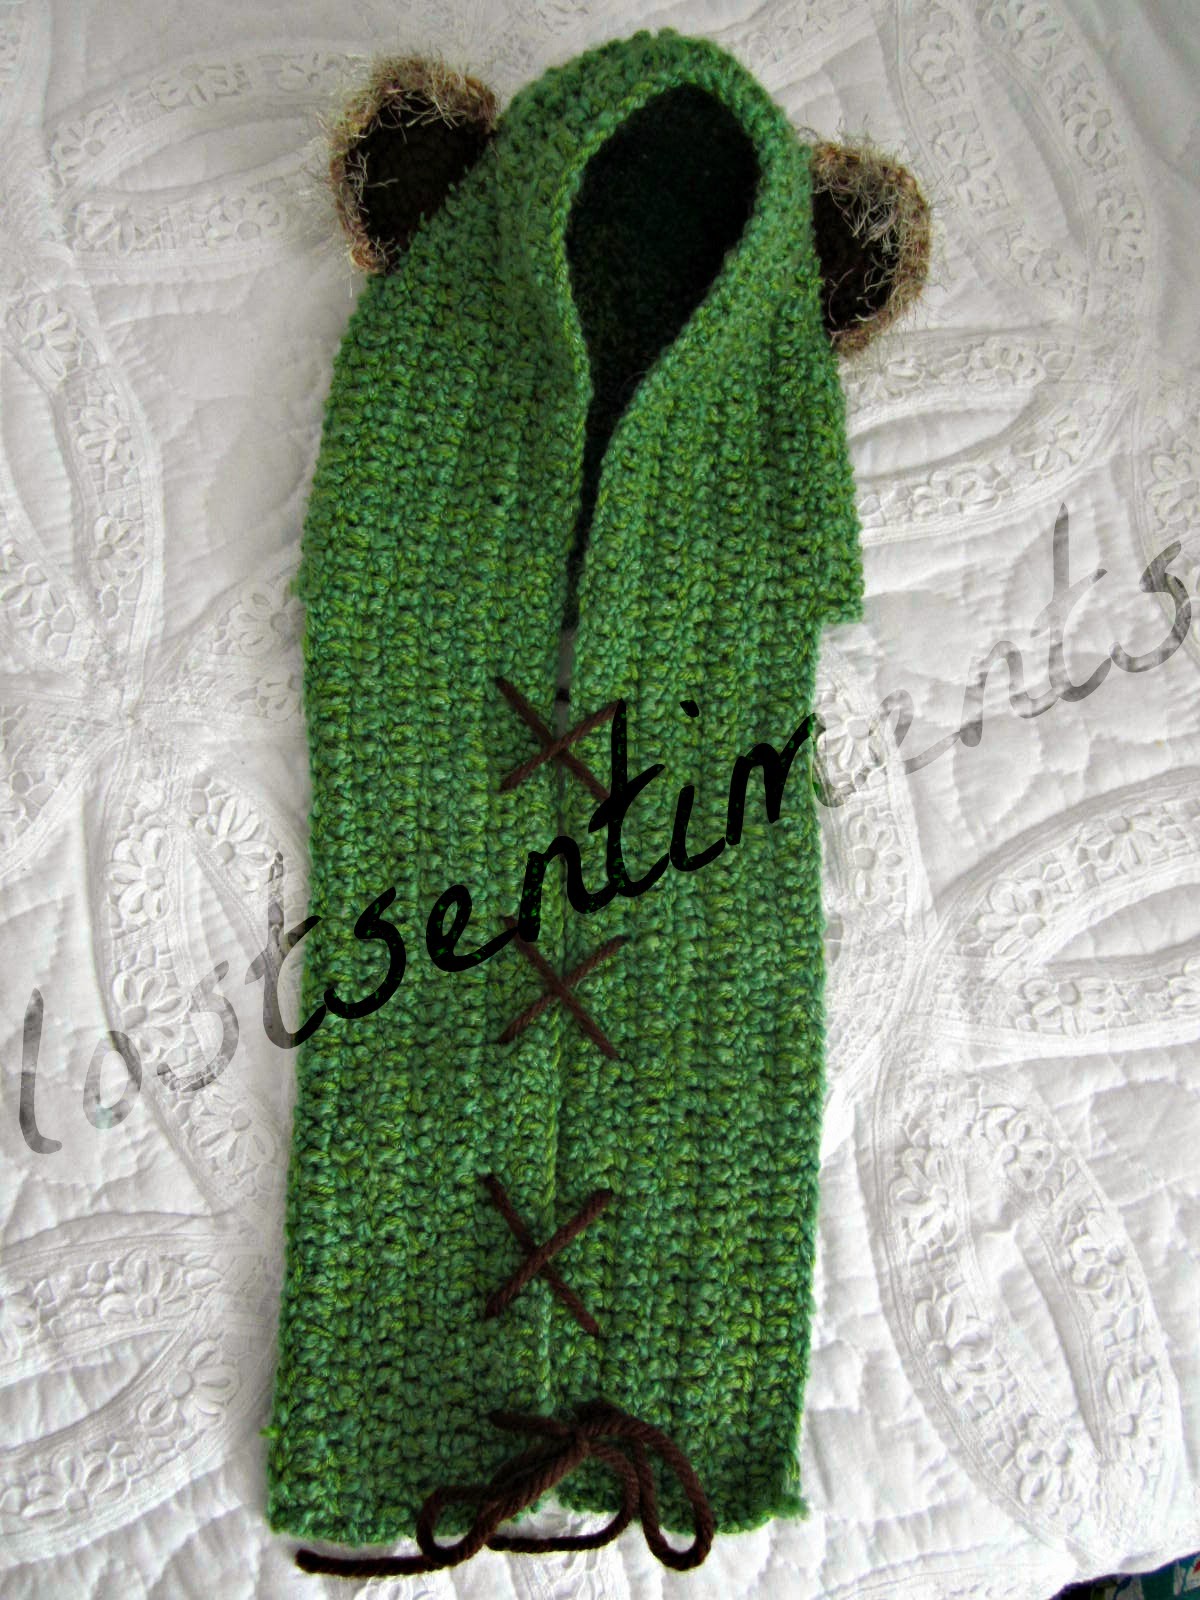
You might remember my post about the pair of Ewok lovebirds scoodies not too long ago... well because my friend shared with the rest of the office the adorableness that is the Yub Nub Scoodies... more were requested.


One for a grandmother (purple), one for a son (green)... one for a friend of mine that loved the pink I used and wanted one just like it, which of course meant that I would be making her adorable daughter one too (still in the works ;))! Because I love them both ;). Last but not least... I made one especially for a 3 year old... who loves the twilight sparkle pony character. So instead of the ears, we have a unicorn horn!!! :D


Yes, the pattern for the horn is mine, yes, I wrote down the pattern as I went and yes I will share it with  you! All in good time ;). Be sure to stay tuned! I'll share the link in this post as well once I have it set up. :)

***UPDATE: cLiCk HERE for the unicorn horn pattern.***


...Twilight sparkle herself ^-^ for a point of reference :). 

I hope you were inspired by the photos! :) 

~Dawn

Monday, February 10, 2014

And then there was a *PINK* Ewok!

...right... okay not really. This is for pretend and creative uses but of course! :D Worn when there just must be more pink, more sparkly & more fun in your day. Yup, that's what I say! ;)  

Since a pink yub nub might be followed and admired by a orange yub nub why not share the pair right? :) Here you go... my latest makings of the star wars kind. Requested by a friend :) 
 Pattern can be found on ravelry for a free download here.


Thursday, November 7, 2013

Crocheted Adult Flamingo Hat - Free Crochet Pattern

 I decided to offer this pattern for free on the blog instead of selling it in my ravelry store or on etsy

I've made 4 in total and they are pretty fun
If you decide to work this up for yourself or a loved one, I'm sure they'll have a great time with it too ;).

***1.3.14 Update***
I received and email today that AllFreeCrochet.com is now offering this pattern on their site!

Welcome All Free Crochet members! 

As AllFreeCrochet mentioned this hat would be neat as a penguin hat too! :) Using a different variety of colors of course ;). If I make one for a friend or one is requested I will share it with you! :) Happy Crafting!


ADULT FLAMINGO HAT

One Size Fits Most

What you'll need: 

Materials:
·         Black 4ply yarn for beak tip and eyes
·         Furry Pink yarn for edging
·         White 4 ply yarn for beak
·         Pink 4ply yarn for hat body
·         Tapestry needle
·         H hook (size 8- 5.00MM)

Finished size: Approximately 23 inches around and 9 inches tall

Gauge: 4 stitches and 5 rows = 1 inch in Sc

Abbreviations:

·         Sc = Single Crochet
·         Dc = Double Crochet
·         Dec = Decrease by working two sc together
·         Inc = Increase by working two sc in the same st
·         Trc = Triple Crochet
·         FO = Fasten Off
·         St = Stitch
·         Sl st = Slip Stitch
·         Ch = Chain
·         X = Times

·         Rep = Repeat

Work through both loops of stitches unless otherwise indicated.


BODY: 

Using pink yarn

At the beginning of each row you will chain, this counts as one for each row.

Row 1:  Chain 2 in in magic loop, Dc 17 in magic loop (18), Slst in 2nd chain to join the round – put a marker at the end of rounds to help keep your place (this is optional of course)

Row 2:  Ch 1, *Sc 1, Inc 1* repeat to the end Sc1, slst  in 1st Ch 1 (26)

Row 3:  Ch 2, Dc 2 in next (inc1) *Dc 2, Inc 1* rep to end, Dc1, Slst in 1st Ch (35)

Row 4:  Ch 1, Sc 3, Inc 1, *Sc 4, Inc 1* rep to end, Sl st in 1st Sc (42)

Row 5:  Ch 3, Trc 5, Inc 1 *Trc 6, Inc 1* repeat to end, Trc 6 (48)

Row 6:  Ch 2,  Dc 2, Inc 1 *Dc 7, Inc 1*repeat to end, Dc 4, Slst in 1st Ch (54)

Row 7:  Ch 3, Tr 7, Inc 1 *Tr 8, Inc 1* repeat to end (60)

Row 8:  Ch 1, Sc 5, Inc 1, *Sc 9, Inc 1*rep to end Sc 3, Slst in 1st Ch (66)

Row 9:  Ch 2, Dc across,  Slst in 1st Ch (66)

Row 10:  Ch 3, Trc across, Slst in 1st Ch (66)

Row 11:  Ch 2, Dc across, Slst in 1st Ch (66)

Row 12:  Ch 1, Sc across, Slst in 1st Ch (66)

Row 13:  Ch2, Dc across, Slst in 1st Ch (66)

Row 13:  Ch 2, Hdc across, Slst in 1st Ch (66)

Row 14: Ch 2, Dc across, Slst in 1st Ch (66)

Row 15:  Ch 1, Sc across, Slst in 1st Ch (66)

Row 16:  Ch 2, Hdc across, Slst in 1st Ch (66)

Row 17:  Ch 1, Sc across, Slst in 1st Ch (66)

Row 18:  Ch 3,Trc across, Slst in 1st Ch (66)

Row19:  Ch 2, Dc across, Slst in 1st Ch (66)

Row 20:  Ch 3, Trc across, Slst in 1st Ch (66)

Row 21:  Ch 1, Sc across, Slst in 1st Ch (66)


Ear Flaps:  Make 2 spaced 22 stitches apart

Row 1: Ch 2, Hdc 10 (11) Ch 2, turn

Row 2:  Skip first st Hdc across (10) Ch 2, turn

Row 3:  Skip first st Hdc across, (9), Ch 2, turn

Row 4:  Skip first st Hdc across, (8), Ch 2, turn

Row 5:  Skip first st Hdc across, (7), Ch 2, turn

Row 6:  Skip first st Hdc across, (6), Ch 2, turn

Row 7:  Skip first st Hdc across, (5), Ch 2, turn

Row 8:  Skip first st Hdc across, (4), Ch 2, turn

Row 9:  Skip first st Hdc across, (3), FO, leave a length of thread and FO.

Now count out 22 stitches from the end of the first flap. Pick up yarn on the 23rd stitch and repeat for the second flap.


Using Furry Pink Yarn

Sc around the brim of hat and ear flap sides with the fuzzy light pink yarn, when you come to the ends of the ear flaps,  skip the 3 st of the end of the flap and instead chain 3 and continue Sc’s on other side of ear flap, Sc around, repeat Ch 3 on next end of ear flap as well.

Ear Flap Braids:

Cut 12 lengths of 36 inch yarn. Follow pictures here to add thread. You can leave them hanging free or braid them to your liking! 


 Since there are now 12 ends to work with on either side of the ear flap you can braid them holding 4 lengths of thread knot the ends with an overhand knot

EYES: Make 2

Using Black Yarn

ROUND 1: Chain 4 into a magic circle to count as the first  Trc. Work 15 more Trc in the ring;  join with a Slst to the top of beginning of chain 4. (16 trc). Fasten off – leave a length of 24 inch thread for sewing these onto the hat.

Sew onto hat between rows 10 – 13 about  9 – 10 stiches apart.

BEAK:

Using Black Yarn

Row 1:  Chain 3 in Magic Loop, 2 trc in magic  loop, (3) Chain 2, turn.

**pull magic loop closed and leaving length of thread to sew beak onto hat later.

Row 2:  Dc  2, Inc 1 in last St, (5) Chain 2, turn

Row 3:  Dc  2, Inc1,  Dc 2, (7)  FO leaving a length of thread.

Switch to white yarn.

Row 4:  Chain 2,  Sc across (7) Chain 2, turn

Row 5:  Dc 2, Inc 1, Dc 3 (8) FO  leaving a length of thread to sew beak onto hat.

 Sew Beak onto hat centered between the eyes between rows 14  -  18

At this point your Flamingo Hat should be all set to go wherever your heart pleases! J Enjoy! J


Pattern copyright of Dawn Pearson. All rights reserved. If you sell products made from this pattern, please link back to this post and credit Dawn Pearson/Lostsentiments as the designer. Thank you.


Monday, October 7, 2013

What's better than a Jayne Hat?

Why TWO Jayne Hats of course! :) 


They are done! After much measuring and gauging and lamenting over how many rows should be done, etc. here they are! :) 

The one to the left is for a co-workers husband and the one on the right is for my husband :). 

You're never too old to play dress up - that's what I say ;). 


Initially I used the pattern from fibre and spice but because I didn't use the same thickness of yarn I was left to my own devices later discovering Keiyla's Blog which dissects all the attributes of the Jayne hat, which was super helpful when it came time to make the ear flaps. 
For all you nerdy knitters I recommend both sites and patterns... 

A thank you to my late grandmother and my mom for the neonish orange yarn that makes up the main part of the hat. These hats would not have been complete without it!

Sunday, August 18, 2013

Crocheted Yoda Hat for a lil boys 1st Birthday Party!

A friend of mine requested I make a yoda hat for a boy she nannies - for his 1st birthday!

I got to tap into my cotton yarn stash to make this lil number :) A hank an a half later you have a yoda hat! :D

It was a treasure hunt finding a site that would give me an idea for children's hat measurements. I stumbled up on a blog called Alli Crafts and thought it had a really good layout and lots of helpful information - so of course I share the blog/link with you here. Though I didn't use her pattern the dimenstion for the diameter and the guide for the earflap stitches were helpful.

The ears.. well the ears were tricky for me. Which was kind of annoying because I was initally going off of Tangled Threads and Random Thoughts yoda hat post which you'll notice has a mere 3 lines to follow. Easy right? ;) One would think! I know I was busy chatting with my husabnd or sister and watching tv, but once I finally focused on the directions long enough to work up an ear and found it to be too short for the yoda look I wanted. I did a bunch of measuring, of photos of yoda's head, of my hat and realized something...Did you know that each of yoda's ears are about 75% as long as his head is wide? Pretty ridiculous. But he is a wise one - so the way I figure it - he learned to use his ears ;) listening more than he spoke. What do you think? :)

Armed with the knowledge of my own guage and then how long each ear would be I started with a chain of 26 and worked the ears like Tangles Threads and Random Thoughts instructed. Later folding the ears to my liking and attached them to the hat! :) Do you like it? I hope its a hit at the birthday party! :D


Related Posts Plugin for WordPress, Blogger...