Showing posts with label custom. Show all posts

Monday, December 15, 2014

Blueba & Boba Fett - Star Wars Amigurumi

If you've been following this blog for any length of time you'll know I am *super* picky when it comes to colors... I'm usually a pretty good judge of what will work and when I'm not, I usually don't get too far into a project before I change my mind. This project was the exception.

I'm a star wars fan as far as I'll watch the movies and enjoy them, but it stops there. My husband however, is a fan as well as many of his friends. All of which I'm thankful for, it helps me to appreciate movies in a much different way than I ever would have otherwise. In this instance, my husband was very instrumental in how this project turned out. My sister and I went to Michael's to find the sacred color for Boba Fett's main color. The pattern from Lucyravenscar looks like a mild variegated green blue. Cuyahoga Valley would have been perfect Michaels did NOT have this color though... womp womp... so my sister and I grabbed a navy blue/teal blue blend by Lions Brand - their heartland series color - glacier ( I LOVE THIS series by the way! All the earthy colors are GORGEOUS and make me happier than they should ;)) I went home, worked up 2 heads and the main body showed it to my husband that night to see what he thought and he lovingly told me Boba Fett's uniform/armor was not blue, if anything I could do gray. I pulled out all the green yarn I had as well to show him because having spent 5 hours working on the Boba Fetts I had already I was discouraged and needed him to back me on the fact that I did not have the right kind of green to make it look like Boba Fett. :) To my relief, he agreed all the green yarns I had were much too dark. I felt my trip to Michaels was validated and he even went on to say I need to get more yarn - lol - true story ;). Since I'm looking for a job I'm not about to run out again to be tempted Michaels, my husband said gray would work, which made me quite happy. I have lots of shades of gray. ^-^ The next day I worked on the gray Boba Fett and took a few pictures of the pair. My husband is keeping the blue guy and he gave him a fitting name of Blueba Fett. I love it! :) He totally helped me redeem my time and added his wonderful humor - lol it's good stuff. ^

At any rate I hope you like the set here too! They are definitely not your run of the mill Boba Fett amigurumi's. :) ...and I'm okay with that. ♥


Monday, October 13, 2014

Free Amigurumi Pattern for Body of Large Doll

It's always quite an anticlimactic thing to finish a project. You work steadily for a while  and pour over the details of each stitch and then... you're done! Projects I take on without a pattern are at first quite daunting I'll admit. I have a perfectionist streak in me so there are times of frustration to be sure - lol. In the end its all worth it though. I have the finalized product and am usually pretty pleased with it. If not, I know much more when I go for round two!

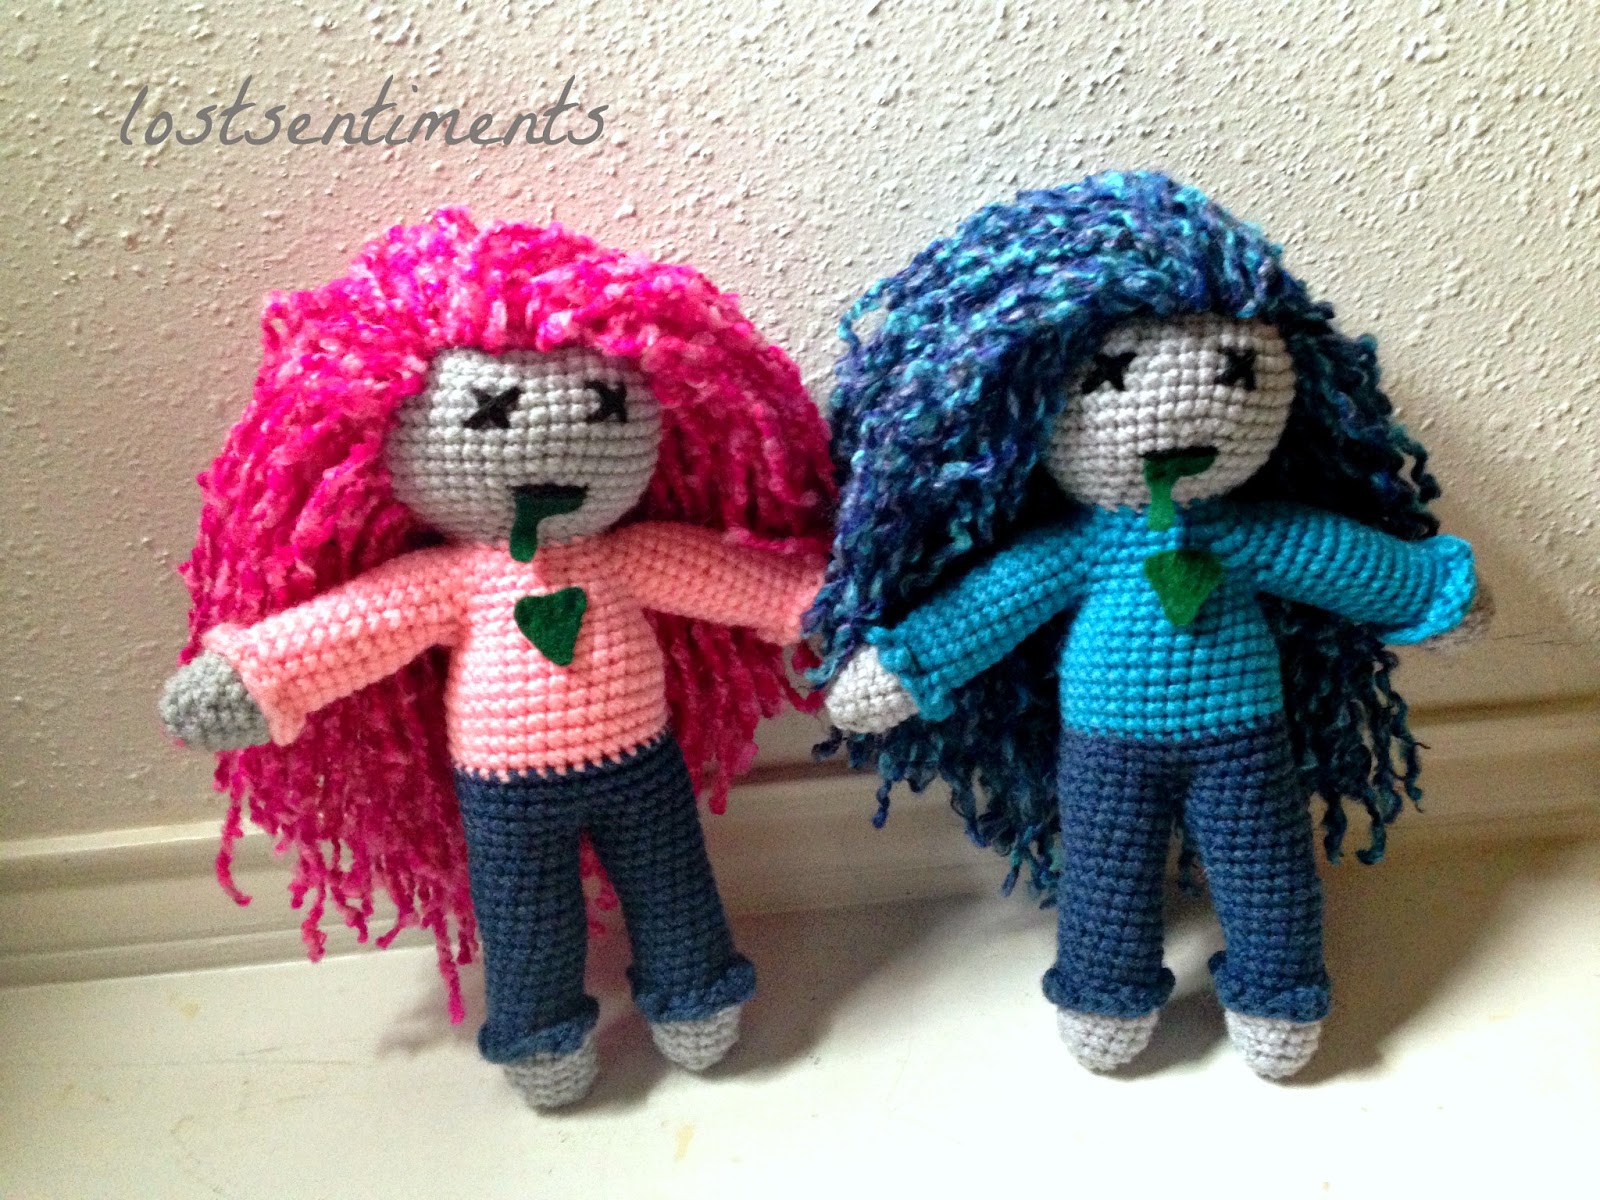
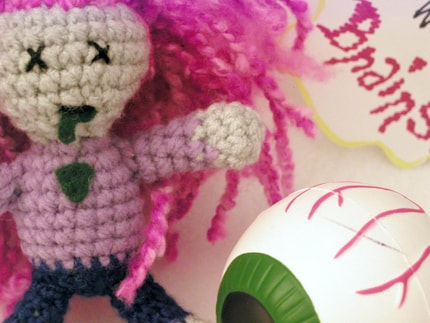
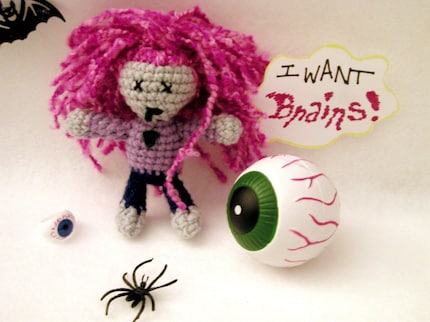
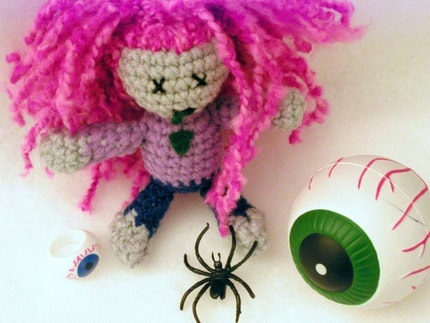
This pattern came to fruition because a friend of mine wanted these for her grandchildren after seeing my tinier version of a zombie - see photos here. I plan to offer the dolls themselves for sale in my etsy shop here.  For those of you who may be smitten with them but don't crochet this is definitely the way to go. They will be offered for a limited time, as the yarns used for at least one of the dolls is discontinued. Speaking of...specifically the pink hair on one of the zombies... (we'll call her strawberry ;) and the other with blue hair blueberry ;)) was discontinued, so I had to do some digging. I was able to find a few people willing to part with a skein or two for the right price to make sure I had enough to work with. Then I set to work. I started out with a large sketch to make sure I liked the proportions of the body, then tried several (about 5 -6 ) different versions of the "Ideal Sphere" to give me the head size I wanted. 


Amigurumi Large Doll Pattern
for the BODY only

Materials Needed:

- H Hook 8-5.00mm
- Skin color yarn worsted weight suggested
- Yarn for pants worsted weight suggested
- Yarn for shirt worsted weight suggested
- Tapestry Needle

Finished size: Approximately 11 inches tall & 8 ½ inches wide.

Abbreviations:

·         Sc = Single Crochet
·         X = times
·         Dec = Decrease
·         Inc = Increase
FLO = Front Loop Only
BLO = Back Loop Only
FO = Fasten Off

Gauge per inch: 4 stitches x 5 rows

With Light Gray Yarn: Work The Ideal Sphere  pattern with 22 Rows through row 20. You will have 18 stitches at this point.

BODY 

Using yarn selected for the shirt


Row 21: Sc around (18)

Row 22:  *Sc 2, Inc 1* Repeat 6 times to end (24)

Row 23:  Sc 1, *Inc 1, Sc 3* Repeat 5 times, Inc 1, Sc 2 (30)

Row 24:  *Sc 4, Inc 1* Repeat 6 times to end (36)

Row 25:  Sc 2, *Inc 1, Sc 5* Repeat 5 times, Inc 1, Sc 3 (42)

Row 26:  Sc 6, ch 2, skip the next 10 stitches from row 23, Sc into 17th St Sc 10, ch 2, skip the next 10 Stitches from row 23, Sc 5 ( At the end of Row 24 you should have 26 stitches, you will have 10 stitches on each side from Row 23 that you'll come back to finish later)

Row 27: Sc 6, Sc 2 across the ch 2, Sc 11, Sc 2 across the ch, Sc 5  (26)

Row 28:  Sc around (26)

Row 29:   Sc 6, Inc 1, Sc 1, Inc 1, Sc 10, Inc 1, Sc 1, Inc 1, Sc 4 (30)

Row 30:  Sc around (30)

Row 31:  Sc 7, Inc 1, Sc 2, Inc 1, Sc 11, Inc 1, Sc 2, Inc 1,  Sc 4 ( 34)

Row 30:  Sc around (34)


Row 31:   Sc 10, Dec 1, Sc 15, Dec 1, Sc 5 (32)

Row 32-33:  (2 Rounds) Sc around (32)

Switch to yarn selected for pants

Row 34 - 36: Sc around (32)


Row 37: Sc 2,  ch 2 skip next 16 stitches, sc in St 19, sc 13. this is the first leg round,  only work around on this leg until end: (18 stitches on 1st leg)

Row 38: (1st leg) Sc 2, Sc 2 in chains, Sc 14 (18)

Row 39: Sc around (18)

Row 40: Dec 1, Sc 2, Dec 1, Sc 12 (16)


Row 41: Sc around (16)

Row 42: Sc 1, Dec 1, Sc 13 (15)

Row 43 - 51 (9 rounds): Sc around (15)

Row 52: Work through Front Loop Only ( hc 1, dc1, sc 1, trc1, hc2, trc1, dc1, hc1, trc1, dc1, sc1, hc1, trc1 slst in 1st st (15) Fasten Off Blue.

Switch back to yarn selected for skin

Row 52 - 53 :Sc through Back Loop Only around (15)


Row 54: *Dec 1, Sc 3* Repeat 3 times (12)


Row 55 - 56: Sc around 12

Row 57: Dec 1 until 6 stitches remain, weave in end in the last 6 stitches and tie ends up.


***Stuff the leg and the body at this point***

Second Leg: 

Using yarn selected for pants


Row 37: Sc 16, chain 2, (18 stitches on 1st leg)


Row 38: Sc 16, Sc 2 in chains (18)

Row 39: Sc around (18)

Row 40: Dec 1, Sc 2, Dec 1, Sc 12 (16)


Row 41: Sc around (16)

Row 42: Dec 1, Sc 14 (15)

Row 43 - 51 (9 rounds): Sc around (15)

Row 52: Work through Front Loop Only (hc 1, dc1, sc 1, trc1, hc2, trc1, dc1, hc1, trc1, dc1, sc1, hc1, trc1, sc1, slst in 1st st (15) Fasten Off.

Switch back to yarn selected for skin

Row 52 - 53 :Sc through Back Loop Only around (15)


Row 54: *Dec 1, Sc 3* Repeat 3 times (12)


Row 55 - 56: Sc around 12


***Stuff the leg and at this point***

Row 57: Dec 1 until 6 stitches remain, weave in end in the last 6 stitches and tie ends up.

On the side that does not have the seam of round changes - consider this the back of the doll - with the front side facing you...


Right Arm: 

Switch to yarn selected for shirt

Row 1: Sc 4 in the bottom portion of the arm, Sc 10 (14)

Row 2 - 12:  Sc around (14)

Row 13: Work through Front Loop Only (hc 1, dc1, sc 1, trc1, hc2, trc1, dc1, hc1, trc1, dc1, sc1, hc1, trc1, slst in 1st st (14) Fasten Off.

Switch to yarn selected for skin

Row 14: Sc through Back Loop Only around (14)

Row 15: Sc around (14)

Row 16: *Dec , Sc 2 * Repeat  times (10)

Row 17 - 18: Sc around (10)

Row 19:  Dec 1 until 5 stitches remain, weave in end in the last 5 stitches and tie ends up.


   Now work the left arm same as the right. Stuff the body till it's as stiff as you want it.

   Sew up in between the legs using the yarn selected for the pants.

Add hair and facial features as you please. If there are enough requests I will add the description for the face and hair of the zombie dolls. This pattern is however just for the body of the doll.

*****

Please NOTE: 
This pattern is Copyright of Lostsentiments 2014.  All rights reserved.
You have permission to sell the finished item from this pattern but rewriting, reselling, distributing or copying the pattern itself is prohibited. 
Please include a link back to my etsy shop or blog in all sales/listings of items. 
Thank you for your understanding and cooperation.

Sunday, March 24, 2013

Avatar the Last Airbender - Earth Kingdom Emblem Carabiner Strap Embroidery


Hello friends! :) I just finished a custom order today for an embroidered carabiner strap! This order came from the same friend who had requested the Fire Nation emblem on a previous strap I made for him. Thankfully I still had some strap left that I had salvaged years ago from a back pack. :) I love seeing things be put to new/good use!

My friend had requested that this next strap have the last airbender Earth Kingdom emblem on it. After pulling out the sewing machine, burning the ends of the strap to seal the threads together and sewing the strap to the same dimensions as the first one I had to decide what embroidery color worked best... a few hours later here you have it.

Working it up!
BACK

FRONT

 I'm not sure why the backside embroidery is not as sharp looking as the front, this was the same case on the first strap. Maybe its the direction the needle goes in *shrugs* I'm not really sure.

Okay - now to send this post to my friend to let him know its done! :D Yay! :D

Saturday, December 15, 2012

I Believe...

...that Christmas is pretty symbolic. Maybe some things weren't originally meant to be but I made them that way in my own mind ;). The tree and decorations - part of the celebration, like anyone would do for a party right? :) Party for Baby Jesus' birthday! ^-^ The star or angel at the top of the tree reminds me of the star the three wise men saw that guided them to baby Jesus or the angels that sang and rejoiced the night he was born. The presents we get to give to each other are wrapped and we get to wait in anticipation to open them ...like all of the old testament - throughout the pages it shows Jesus was on his way... what an awesome present He is ^-^. So while St. Nicholas is another story as well having brought gifts to people, which is another cool story :) the symbolism I see in the shirt I wore is more that I believe in the "magic" of Christmas and the possibilities... that anyone who truly wants the way, the truth and the life can have it, in abundance through Christ. Its a pretty awesome story - why not be excited for Christmas!? :)

I added a few embellishments to the t-shirt for the Christmas Holiday party at work. Of course this was brought on by a co-worker who said we should don tacky Christmas shirts :) though I think I may have failed because most people just said the shirt was cute lol :)

It was a good time - my coworkers get up reminded me of a girl in the 1960's who would be ice skating. Super cute :) And while I wore my santa hat I did not come home with it - because I SOLD it :). (yay!) :)

Alright - I hope you enjoy the pictures! :) We had a lot of fun with them :)

In a Winter Wonderland

Lovely Laura and Myself :) 

We be dancin' ! :)

And the tacky shirt itself :) 
I added a pompom to the top of his hat and pieces of felt and yarn to the shirt :) 

Monday, October 8, 2012

Viking Hat gets an Upgrade for a Baby...

Dats right! What? I mean why not? :) If ever someone should don a I'm-gonna-kick-yer-butt viking hat why shouldn't it be a baby? :) In all fairness he's over 6 months old okay? I'm sure he can hold his own ;).

Hahaha :) Joking aside I'm really excited about this project. It came to me as a custom order and I'm writing up the pattern as I go. Mad skillz I know right? ;) The hat is a mix of knit and crochet. Its true I struggled through the main part of the hat, just setting up the base, the canvas if you will... when it comes to making the decreases needed for the crown of a hat, how many wedges you create as you decrease matters! It can really alter the look... so it took me a few tries and much grumbling... I think I had too much coffee ;P and when I'm not seeing progress I wonder just how long is a project really going to take me... more grumble cakes... oye vey... but I did it! I finished the base of the hat, then knit the "plate" and crocheted the "rivets" and sewed them on. I had to make up an ewok that was ordered earlier last week so this is where the project lies. I plan on adding some kick ass horns sometime this week with furry cuffs (oh yes ;)) and will update as I can.

Thank you for reading! :)


Saturday, June 23, 2012

Avatar the Last Airbender - Fire Nation Emblem Carabiner Strap Embroidery

A friend of ours requested a carabiner strap and said if I was feeling adventurous I could embroider the fire nation emblem on it. I was not about to back down from such a request ^-^. My friend sent me a photo of the fire nation emblem and I made sure that as I embroidered both sides had the logo facing the right way, so no matter how he held his keys the side facing him would always look right.  He was so excited after I sent these finalized pics to him. :) He said he was counting down the hours until he got out of work after seeing it because he couldn't wait! :)

What a compliment :) This is the kind of response that makes every order worth it :) - seeing and hearing people delight over the art I make :). Enjoy and thank you for reading!


Sunday, June 17, 2012

Collar Necklaces so far...

I've been busy training for a 10k with my sister and a friend of hers though I'm not signed up for a race I've been following their racing schedule which has kept me off my butt and away from crafting. This post feels like its a long time coming - 3 collar necklaces about 95% done. Both the black and feathered necklaces are reversible, all 3 need their center piece added which I am hoping I will get to this week. I hope you like the pictures - happy to be sharing the progress! :)


P.S. The pink one is made out of velvet... what a pain in the butt to work with that fabric! LOL it's slippery and even when pinned does not lay correctly. I'm glad I did not know this ahead of time because quite frankly I think velvet as a necklace is awesome. :) Be warned though, if you attempt to sew with it it acts like a wet noodle - very elusive even when you stab it with a fork!


Wednesday, May 11, 2011

DOMO!!!!

Hello! :) Next on the to do list became an amigurumi Domo! :) My friends son has a birthday coming up and this was a last minute put-him-together-though-you've-never-made-him-before project. I looked at a few pictures of Domo and set to work. I had safety eyes already at my dispose so that was lucky :)- I don't know of any stores that carry them, only those online. I did improvise the pattern and typed it up as I went. There are a few things I want to tweak on it but here is my first amigurumi domo! :) Enjoy!


Saturday, August 14, 2010

Harriet the Amigurumi Hippo ^-^

Meet who I would call Harriet :0) Harriet the Hippo :0)

Full of curiosity and fun! I tweaked a recipe for the pattern I found here.  But, as mentioned only used it as a base and went from there :0) You might notice there was no tail on the one with a pattern, I HAD to add one! :0) It's soo cute! :0) ^_^

A friend of mine whom I made through Freecycle loves Hippos and upon request made this one. It took me a few months though only because I kept putting it off with the housework that needed to be done so I could focus on it.

I only just sent my friend the pictures :0) hope she (and you!) love them! :0)


Thursday, March 4, 2010

I want BRAINS - Custom Made Zombie Girl! :D

Yay! This WAS FUN!!! :D

Complete with crazy hair, slime, a null for eyes :D Sooooo excited to share with you :) Here she is!


I was asked by a fellow etsian to make an amigurumi zombie that had a face like this one, with similar features, but clearly not the same body:


Thank you for looking! :D

Sunday, February 21, 2010

OOAK Amigurumi Penguin - Iced Tea

I think of Iced Tea.... Yes, have some... lol :) Just my humor, forgive me ;)

At work our "mascot" is a penguin. A few months ago I won a customer service award and it was an etched glass penguin that sits on a base and lights up. Well, a coworker of mine who comes in and does filing every morning noticed the piece and started to tell me about her daughter loving penguins, how she would get one of those for her in a heart beat basically. Which started getting my mind on Etsy - I know there are many artists there and someone I'm sure does etched glass.

Of course my brain going through channels the next came upon ME making a penguin.

You may or may not notice that I primarily have bears in my shop. You might wonder, why primarily bears? I picked them because I thought they were classic and the pattern is fun and they are adorable. For me its an undertaking to make a pattern from scratch even when I know in my heart of hearts I can create or replicate an idea just with my hook and the right color thread. But honestly, it can be an overwhelming task to me. The sheer time and attention I want to give it I must, especially if it's my creation. There is no "settling" here.

I thought of the chick in my store and realized I could use that as the illustration of what I could make for her daughter. I pitched the idea to her in an email. As my coworker went onto do her filing I told her I sent her and email about penguins and laughed cause I was both nervous she might not be interested and excited 'cause she just might be! :) LOL She said "thank you".

Within the next hour she got back to me and said that she wanted one. I was of course tickled pink and she was all about getting the money to me asap. lol Which is funny to me because I like to wait until I know I've made 100% what they wanted before I get the money.

Onto the weekend!


Yesterday and today I was busy making my coworkers penguin and then writing up and taking down exactly what I wanted my penguin to look like. Please see the pictures:) The one with eyes like the new chick on the block: is the one for my coworker.

Thank you for reading :)

Sunday, January 17, 2010

Finished U900 Ukulele Duo :)

I was asked to make the U900 Ukulele duo without having heard of them and without a pattern.

Custom orders (as always) are a learning experience for me :)! I dont' know what size thread or needle the original creator used but they did an amazing job!

I made their jackets out of aluminum foil :) and sewed on their "identities" ;).

The bunny is Usagine U, and the bear is Kumano 900.

Here is a link to see a slideshow, so you can see stills of them.

I tried to take pics like a few of the scenes I saw on the clip:)


**UPDATE** 9.22.12 I have written up the pattern for both of these guys and they can be found at my etsy store in the pattern section or if you have a ravelry account you can download them directly from there! :)

Wednesday, January 13, 2010

U900 Custom Order Amigurumi...


They are in the works! Boy does my wrist know it too! ;)

I'm just about done! Here are some pics of Usagino U Bunny and his sidekick Kumano 900 Bear :)
Here is a slideshow, so you can see stills of them:

I'll be so glad to have them finished :) I'm always happy to do custom orders but they can be really time consuming (like REALLY time consuming). There is no pattern that I 'm aware of online for this duo so I had to make them FROM SCRATCH :p.
Alright, alright, so a few pictures, albeit rough ones... :) remember they are without their metal jackets... but they will have them before long! :D

**UPDATE** 9.22.12 I have written up the pattern for both of these guys and they can be found at my etsy store in the pattern section or if you have a ravelry account you can download them directly from there! :) 

Wednesday, December 9, 2009

The Bobblehead Stand


... is finished - and he is now "complete" my mister said it was pretty much imperative that I make a stand to go with him - so while it took longer to do and my fingers hurt :S the mister was right :) . Mr. Bobblehead can stand on his own now too without much coaxing so its good stuff ;). Here are updated pics - enjoy! :)
Related Posts Plugin for WordPress, Blogger...